
Images are the first things your visitors notice when they land on your website. A stunning, high-quality photo can capture attention and build immediate trust. A poorly optimized or pixelated image, on the other hand, can drive potential customers away. Choosing the right visuals is only half the battle. How you format and deliver those files behind the scenes determines whether your site feels fast and professional or sluggish and outdated.
Why do images make or break a website?
Great images tell your story and guide visitors toward making a purchase. However, using the wrong image files can severely hurt your site speed, which frustrates users and lowers your ranking on search engines.
When a page takes too long to load, people click away. Most of the time, heavy, unoptimized images are the primary reason a website feels slow. Balancing visual quality with technical performance is the secret to a successful site.
How does image size affect website speed?
Large image files force your visitors’ browsers to download massive amounts of data, which slows down your page loading times. Many business owners upload photos straight from a smartphone or stock photography site without resizing them first.
A photo directly from a modern phone can be over 4,000 pixels wide and take up 10 megabytes of space. If you need that photo to sit in a small sidebar, you are making your visitors download a massive file only to display it at a fraction of its original size.
Sizing images for the right container
To keep your site fast, you must resize your images to match how they will actually appear on the screen.
- Full-Width Images: For hero sections or background images that span the entire width of the screen, aim for a width of 1920 pixels. You could double this if you really want the quality to be extra-sharp on some screens, but it’s a tradeoff in speed.
- Standard Blog or Content Images: For photos that sit inside your written content, a width of 1000 to 1200 pixels is usually plenty.
- Small Thumbnails and Icons: For small team headshots or feature icons that only take up a small portion of the screen, resize the image to 300 or 400 pixels wide. Note: Some platforms like WordPress automatically create smaller images in these sizes, so check with your platform to see if these are already available.
What are the best image file formats to use?
The best file format depends entirely on what the image shows, and using the correct one keeps your file sizes small while maintaining sharp quality.
Here is a quick guide on when to use each standard format:
JPG (or JPEG)
This is the standard format for photographs and complex realistic images. JPGs balance color detail and compression very well, allowing you to have beautiful photography without giant file sizes.
PNG
Use PNG files for graphics, logos, and images that require a transparent background. PNGs preserve sharp lines and text perfectly, but they can become incredibly heavy if you use them for standard photographs.
SVG
SVGs are perfect for icons, logos, and simple vector graphics. Because they are based on math rather than pixels, they stay perfectly sharp at any size and have tiny file sizes.
Note for WordPress Users: WordPress does not allow you to upload SVG files by default due to security settings. You will need to install a lightweight, safe plugin like “SVG Support” to enable this feature on your website.
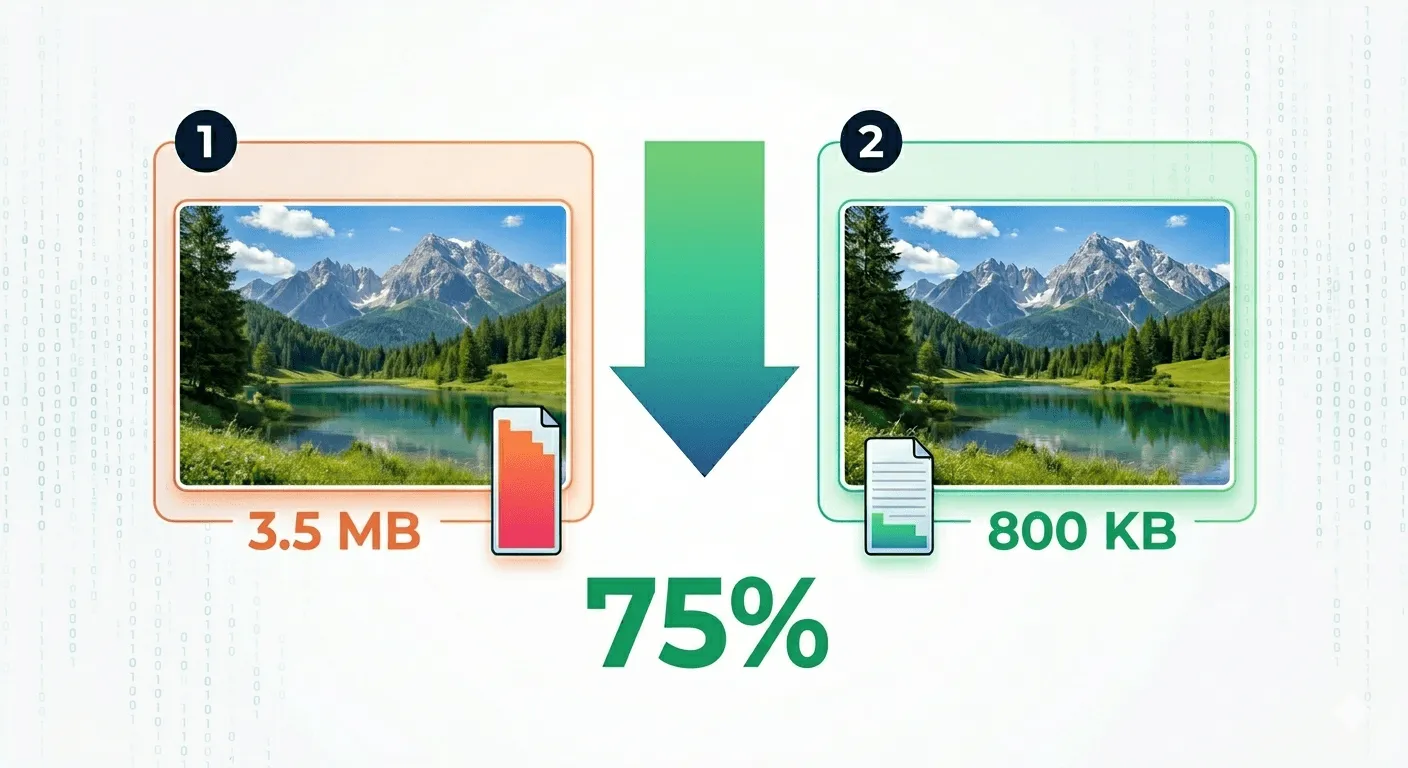
How can I shrink image files without losing quality?
To get your images as small as possible before uploading them, you should run them through a specialized compression tool.
A fantastic, free tool for this is TinyPNG (which also works for JPGs). You simply drop your resized images into the tool, and it strips out unnecessary hidden data and optimizes the colors. This often shrinks the file size by another 50% or more while keeping the image looking virtually identical to the original.
How can I make my images load even faster?
To get the absolute best performance out of your website, you can use modern delivery methods that ensure images load instantly for users all over the world.
Convert your files to WebP
WebP is a modern image format created specifically for the web. It provides superior compression compared to JPG and PNG, often reducing file sizes by 30% or more without any visible loss in quality. Most modern content management systems can automatically convert your images to WebP when you upload them, while some may need an extra plugin. It’s also possible your web server configuration may need to be adjusted to properly provide .webp files to users.
Use a Content Delivery Network (CDN)
A CDN is a network of servers located all around the world. When someone visits your website, the CDN delivers your images from the physical server closest to that visitor. This reduces the physical distance the data has to travel, making your site load much faster for global audiences.
Why is putting text directly inside an image dangerous?
Placing text directly into an image file makes your website less accessible, hurts your search engine rankings, and often results in your words getting cut off on mobile devices.
When you use a photo with text baked into it, search engines like Google cannot read those words, meaning you lose out on valuable SEO keywords. Furthermore, websites are responsive, meaning they shift and crop images to fit vertical smartphone screens and wide desktop monitors. If your text is part of the background photo, there is a high chance it will get cropped out or become too small to read on a mobile phone.
For those with vision impairment, that text is al unaccessible.
Instead of baking text into the image file, always use your website builder or developer to place real text on top of the image as a separate layer.
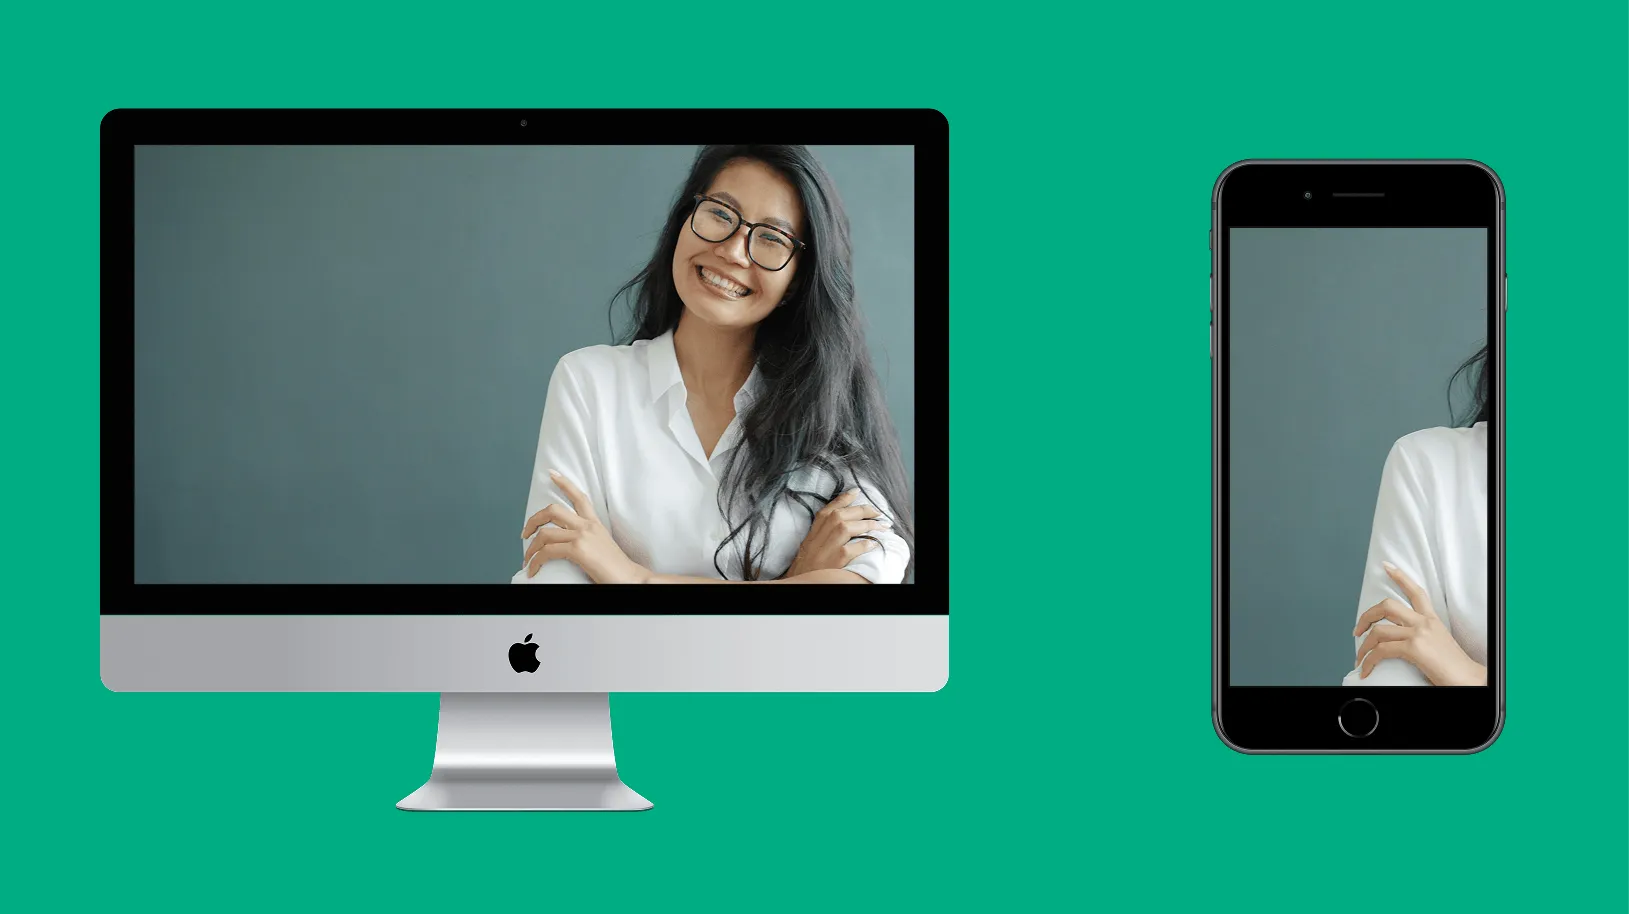
Where should the subject of my photo be located?
To ensure your images look good across all devices, you should usually place the main subject or point of focus in the center of the frame.
Because web designs automatically crop the edges of photos to fit different screen shapes, the outer edges are the most likely areas to get cut off. Keeping your subject in the middle ensures it stays visible whether someone is viewing your site on a giant monitor or a narrow smartphone.
The main exception to this rule is when you are intentionally using a wide banner image where you need the subject on one side so you can place clean, readable text on the other side. This can usually be resolved using your editor, or your developer should take this into account.
By combining proper sizing, the right file formats, smart compression, and strategic layout, you can create a visually stunning website that loads at lightning speed. Need help optimizing your site? See how we built a blazing-fast website for a local New Hampshire business, or learn how a professional agency can handle the technical details for you.
Frequently Asked Questions
How do I resize my images if I don't have Photoshop?
You can use free online tools like Canva, Squoosh.app, or standard built-in computer programs like Preview on Mac and Photos on Windows. Simply open the image, look for the resize option, and set your desired pixel width.
Will switching to WebP make my images look blurry?
No, WebP is designed to retain high visual quality while drastically reducing the file size. In most cases, the human eye cannot tell the difference between a standard high-quality JPG and a compressed WebP file.
Do I really need a CDN if my business is local?
While a CDN is most beneficial for global audiences, it still speeds up your site for local users by reducing the processing load on your main web host. Many top-tier hosting companies include a free CDN with their plans.
Is there a way to automate TinyPNG so I don't have to do it manually?
Yes. If you use WordPress, TinyPNG offers an official plugin that will automatically compress every image you upload to your media library.
What should I do if my logo has text in it?
Logos are the exception to the "no text in images" rule. Because logos are specific brand marks, it is fine to have text in them. Just be sure to upload them as sharp SVG or PNG files with transparent backgrounds.
Ready to Start Your Project?
Let's build something great together. Get a free, no-obligation estimate.